
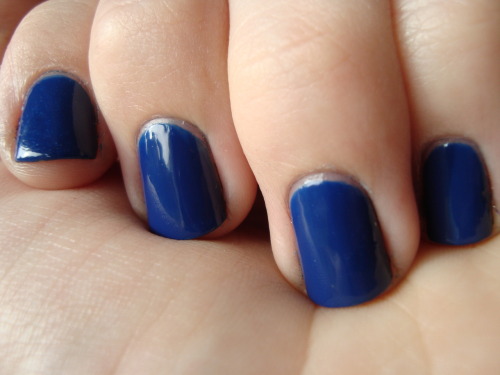
Pushing is best done while your nails are bare and clean. I remove my polish this way, if you're wondering. Olivia's timing was better than she could have known, since I wound up wearing the same mani for a whole week recently. That's almost unheard of for me. Since I didn't change my polish in that time, my cuticles went untouched too. The photo below is as wild and free as they're ever allowed to get.

Part of the reason I focus so strongly on them is that they go wrong quickly. My left index nail gets a nasty little ridge along the thumb side. If I don't tend to this often, I get hangnails and other issues and it affects the way my polish wears.

My right hand never looks as good as my left. The nails are wonkier, the fingers more crooked, and right now one of the nails is even a good 3-4mm shorter than the rest. Erg. Fixing that today, at last! My cuticles also always look worse on the right, partly because they don't get the gentle cleanup brush nudging I do when I remove old polish as often as the lefties do. My right index and middle fingers are especially troublesome. These were the last bastions of my old peelie problems, so it's no surprise. I wash this hand more and use it more and the wear and tear shows.

So that's the terrain. Here are the tools...

This is the only cuticle remover I've ever used in the history of this blog. I don't mean this product generally. This tube is THE tube I've had this whole time. This shit is endless, I swear. My plastic pusher is younger, yet showing its age. Since it's non-porous it's still safe to use when kept clean. There are three main kinds of pushers; plastic, wood, and metal. I'll never trust another orange stick (plus they're porous and not as hygienic) and metal is almost as scary, so I use plastic. They're the best choice if you have soft nails. This specific one is from Walgreens, but they don't carry this style anymore. You can find similar pushers easily though.
With the pusher set before me (so I don't get gel everywhere), I apply the gel only over the margin between skin and nail. Nichole spreads it over the whole nail, but I find that to be damaging. My nails aren't as tough as hers. This is as much as I use.

This gel is a 10-min treatment, so with a few minutes left to go, I start pushing gently.
 |
| Thanks for taking these pushing photos, Player 4! |
This is just the initial push. I can't see what I'm doing through the gel, so I'm very careful. I spread the gel back onto my cuticles after pushing.

At the ten minute mark I go to the bathroom sink and thoroughly wash my hands and pusher in warm, soapy water.
Once I'm back at my desk, I slather up with Burt's Bees Lemon Butter Cuticle Cream and begin the real pushing. Now I can see what I'm doing! I start by pushing up toward the knuckle with the pusher flat against the nail plate. This detaches any dead stuff that wasn't removed in the first push. Like nails themselves, the cuticle tissue that moves forward as they grow is completely dead. Pushing should never hurt or leave your fingers feeling sore. If it does, you're pushing too hard and/or too deep. Remember that the living tissue back there is what guards your new nail growth.

Once the major pushing is done, I touch up any tricky spots with the tip of the pusher. You have to be extra careful if you do this, but it's a good way to shape the cuticle, if needed.

Sometimes there's something stubborn. Guess which nail gave me grief this time!

You need to be really careful with the resistant stuff like this. Push too hard and you could damage your nail or slip and jab your finger with the pusher. A combination of targeted pushing and buffing helped, but then I noticed something else.

That's not skin. That's nail. NEVER pull a micro-peelie like this. Buffing will smooth it out.

Stuff like this can take a little while to resolve. It's better to admit temporary defeat than cause longer-term harm. This is better at least...

Notice that no cutting of any kind has happened? I'm 100% opposed to trimming, nipping, cutting, etc...at least where cuticles are concerned. There are two things I cut as needed. Hangnails need to be trimmed or they'll tear. They're also a huge temptation if you're a recovering picker and/or biter like I am. If you see this, get the nippers or tiny scissors.

The other thing I cut is a little more controversial. I get a hard buildup of dead skin on either side of my fingertip at the corners of my nails. It's unsightly and just as pick-prone as hangnails for me. It's gotta go! This is an infection risk if done wrong, so if you're going to do it be sure to only cut dead tissue. Dead skin is clear, hard, and bloodless. This next photo's kinda gross, but this is what dead stuff looks like once it's cut part-way off. See how clear it is?

If you do this, give your finger a firm squeeze after trimming. If the area you've trimmed from bleeds or is unusually shiny, you've cut too deep and should monitor for signs of infection (redness, unusual heat, failure to heal) for the next few days.
It's easy to focus too hard on tiny imperfections. Zooming back out to real world distance is sometimes necessary to keep from obsessive over-pushing or clipping. My left hand looks good now.
 |
| that little cuticle fringe on my middle finger will shrink up as it dries |
My right hand looks ok too, for all of its faults.

I give both hands another, longer rubdown with the cuticle cream.

I do this full treatment only every month or so. I also push gently with my removal cleanup brush when taking off polish and do a cuticle cream-only push every week or two.
If you're starting from "scratch" or haven't pushed your cuticles in more than maybe six weeks, it will take several full treatments to see a real improvement. For anyone needing inspiration, here are a few of my old photos.
First up, here's what my cuticles look like un-pushed.
 |
| a bunch of polishes |
When you start or start over, it's not unusual for them to look worse at first. Dead stuff may stick up. Either trim it with extreme care, tuck it under, or just leave it be and up your remover treatments to weekly or twice-per-week.
 |
| China Glaze Man Hunt |
It gets better as you keep up with the pushing.
 |
| OPI Louvre Me, Louvre Me Not |
Stick with it and eventually people will remark on how invisible your cuticles seem!
 |
| China Glaze No Plain Jane and Swanky Silk gradient, over white |
These photos were all taken within a period of maybe ten weeks. The change is pretty drastic and really makes a huge difference in how my photos looked. If your nails are a painting, the cuticles are your frame.
Beyond all of this, I also moisturize like a fiend and keep my hands as dry (in the water sense) as possible. Water isn't as damaging to skin as it is to nails, but drying your hands and nails thoroughly after washing and wearing gloves to wash dishes or do other wet chores will make a noticeable difference.
So there's really nothing special about mine, it's just putting in the time and keeping up with the growth. You can do it too!


Great post! I've never used cuticle gel, although I have purchased with the intent to. This was very helpful and will ensure that I am very careful to not overdo it. Thanks, Amanda! :-)
ReplyDeleteThis is a very helpful post! I bought some instant cuticle remover, but I have been having a hard time finding a rubber tip pusher that isn't part of a pedicure kit. I need to get to Sally's soon since i am sure they will have one.
ReplyDeleteWow, I learned so many thing I need to start doing... Like wearing gloves when I do the dishes, never would've thought of that. Great post!
ReplyDelete